Sabit vidalama ünitesi, vidalama istasyonuWSM Automation
Schraubstation


Makineye ait bilgiler
- Makine adı:
- Sabit vidalama ünitesi, vidalama istasyonu
- Üretici:
- WSM Automation
- Model:
- Schraubstation
- Durum:
- iyi (kullanılmış)
Fiyat ve Konum
- Konum:
- Dunkerstrasse 29, 46325 Borken/Burlo, Deutschland
Teklif detayları
- İlan Kimliği:
- A7380038
- Referans numarası:
- 25069
- Son güncelleme tarihi:
- 16.02.2026
Açıklama
Assembly of components for car radios and navigation systems, as well as testing the same.
The assembly station is surrounded by a safety enclosure.
The service doors are equipped with monitored interlocking switches.
During automatic operation, the doors are locked and can only be opened when the automatic process is stopped or in manual mode after pressing the 'Doors' button on the control panel. Automatic operation cannot be started with an open door.
Functional Sequence
The station is loaded with the pre-assembled module via the transfer conveyor.
Below, the work steps of the automatic station as a workpiece carrier (WT) passes through are described.
In normal operation, all 3 stations work in parallel.
- Positioning the WT with the pre-assembled module in St.2.1
- Lowering the carrier with the scanner and vision sensor
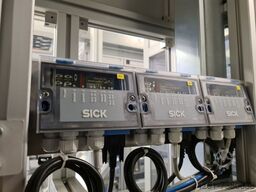
- Scanning of the 3 codes (front panel, front PCB, SD PCB), matching with the database
- Checking the correct latching of the FFC in the connector
- Raising the carrier and lowering the WT back onto the conveyor
- Positioning the WT with the pre-assembled module in St.2.2
- Positioning the screwdriver and fastening the front PCB
- Lowering the WT back onto the conveyor
Fgedpfx Aoibichsbisc
- Positioning the WT with the pre-assembled module in St.2.3
- Lowering the light protection hood and making contact, moving the carrier with the test sensors from below
- Type-dependent testing of the illumination of SD and CD slots and buttons
- Functional test of the CD eject button
- Lowering the WT back onto the conveyor > continue
If errors occur during testing, they are displayed, and if possible, can be rectified.
For this, manual mode is activated and the doors are opened. After repair and restarting automatic mode, the WT is tested again in the station.
If repair is not possible (e.g. screwing error), the WT is marked as NIO (not in order) in the controller and is not further processed.
Manual marking and removal of NIO units is also possible.
Financing through our partner bank is also available.
komplett-konzept.leasingo.de
More new and used assembly stations can be found in our shop!
International shipping rates available on request!
Bu ilan otomatik olarak tercüme edildiğinden bazı çeviri hataları oluşmuş olabilir.
Tedarikçi
Kayıtlı seit: 2008
555 çevrimiçi ilan
İstek gönder
Telefon & Faks


 Borken
 BoschTurbo Scara SR 8 + IQ200


 Borken
 EpsonG10-854SR

Machineseeker-güven damgası
Güven damgası nedir?
Machineseeker, Machineseeker güven damgası ile seçili bayileri sertifikalandırmaktadır. Tahsis öncesinde deneyimli Machineseeker personeli tarafından standartlaştırılmış ve kapsamlı bir kontrol gerçekleştirilir.
Ne kontrol ediyoruz?

Ticaret izni veya ticaret sicil özeti kontrolü
Satıcının
posta adresinin kontrolü
Banka bağlantısı doğrulama
Ana numaranın
telefonla
erişilebilirliğinin doğrulanması
Ekonomik bilgi
olumsuz özellikler içermemelidir
Alıcı Şikayetleri
mührün geri çekilmesine yol açabilirBu, bir alıcı olarak sizin için ne anlama geliyor?
Machineseeker güven mührü sayesinde, alıcı olarak kendi kontrolünüz olmadan büyük olasılıkla dürüst ve güvenilir ticaret yapan güvenilir satıcıları tanıyabilirsiniz.
Elbette, satın alma sürecinde yine de anlaşmazlıklar ortaya çıkabilir. Machineseeker, Machineseeker platformunda aktif olan alıcıların veya satıcıların yasal ihlallerinden sorumlu değildir.